Monday, October 27, 2014

Dinner Meal Plan: Week of 10/27/2014

This week's meal plan! Enojy!

Tuesday:
Zuppa Toscana (Sausage, Kale and Potato Soup)

Wednesday:
Leftovers

Thursday:
Garden Salad

Friday:
Mummy Hot Dogs (Happy Halloween!)


What are you having this week?

Friday, October 24, 2014

Travel: We went to Colorado!

We had a ton of fun last weekend in the mountains!  Handsome and I decided to take a long weekend and breathe in some fresh mountain air.  We (actually I) hoped for some cooler weather, but it was actually about the same temperature as home (you can't win 'em all, I guess). Now, pictures!

We stayed at the 3rd Street Nest Bed and Breakfast (so cute, I highly recommend it!)
http://3rdstnestbb.home.bresnan.net/

Lunch at La Baguette in Old Colorado City
(Seriously, look at that French Onion Soup! So good!)

Pike's Peak

How this went: "Let me take your picture in panorama and you can be in the picture twice."
"Ok."
"Do a funny pose!"
"I am!"
"Come look at this. You didn't do anything funny at all!"
"Yes I did.  Look, I did a thumbs-up!"
*Sigh*

Helen Hunt Falls (Thanks for the recommendation, Diane!)

Helen Hunt Falls

We took a drive on Gold Camp Road in North Cheyenne CaƱon
(Look, a tunnel!)

Dinner by the Arkansas River at River's Edge in Salida

The Royal Gorge

And then the real reason I go to CO, so I can look at Aspens.

Sunday, October 5, 2014

Dinner Meal Plan: Week of 10/5/2014 (With Recipes)

I don't know if this will be helpful for anyone, but I usually spend an hour or so each Sunday or Monday planning 3-4 meals for the week (depending on what leftovers we already have and what each recipe yields) and then buy all of the groceries I need for the week.  I look at the grocery store's weekly ad, but don't always choose to buy from it.  I usually plan to make something with leftovers at the beginning of the week for lunches.  This week is a little different, because we made two pizzas today and can have leftover pizza and fruit for lunches early this week.  I also try to plan quick or slow cooker meals for the days I'm working so that we can eat soon after we get home (dinner is usually at 5:30 at my house!).

I looked through my refrigerator and freezer to help me plan meals this week.  I saw that I have some eggs that need to be used up.  I also stumbled upon some game bird in the freezer (Chukar).  I can usually find a lot of, um... inspiration (?) this way.

Sunday/Monday Prep:
  • I often buy a head of Romaine (or "green lettuce" as my grocery store calls it) and wash and chop it on the day I buy it.  I store it in a gallon storage bag with a paper towel and I try to have as much air in the bag as I can.  It's 99 cents per head of lettuce, which is way cheaper than a bag, and it lasts quite a bit longer.
  • Wash, prep, and portion fruit &/or veggies in small containers to grab for lunches
  • Homemade yogurt cups in small containers:  1 serving greek yogurt, chia seed jam scooped on top (to taste, depends on how sweet it is)

Monday:
Chukar Piccata, Angel Hair Pasta, Green Salad
(note: Chukar is a game bird.  Chicken is typical in this recipe)

Tuesday:
Cobb Salad (lettuce, chopped ham/turkey, hard boiled egg, shredded cheddar, red peppers, avocado, shredded carrots, green onion, olives, bacon, ranch dressing)

Wednesday:
Slow Cooker Pasta Bake (I won't use a recipe, but something like this, probably with broccoli & cauliflower)

Thursday:
Leftovers

Friday:
Irish Beef Stew (Slow Cooker)


What are you having this week?

Saturday, August 16, 2014

How I Style My Naturally Curly Hair: Part 3

How do you style your hair?  What products do you use?  Do you use a diffuser or other tool?

Step 0:  Wash your hair as described in Part 2.  Your hair should now look something like this.

Hey-o! Straight out of the shower selfie


I almost always use three products on my hair.  The first product depends on my hair's length.  For the medium length hair I have now, I love this texturizing cream.  As you know, my hair has a fine texture, and this cream gives it some "grip" and hold without being crunchy.  For short hair, sometimes I don't use anything besides mousse and hairspray, and for long hair, I typically use some sort of gel, because it helps with frizz (I've found that I have to touch my hair a lot more when it is long).

For a diffuser, I use Revlon Ionic Tourmaline Ceramic hairdryer, as I wrote about here.

The Lineup

Step 2:  Flip head over.  Dispense product into one hand.  Distribute product between both hands.  Apply product to hair, starting at ends. (We're only doing mousse and cream for now.)

MOUSSE:  I go ALL over, starting at ends and scrunching into roots.

CREAM:  I go on ends and middle ONLY.

Step 3:  Part hair and shape curls.  Shaping takes a little practice, and you may need to add some water to get it to curl like you want.  I typically just shape the curls around my face and maybe the top layer of my hair.  This helps the hair lay a little better.

Flip hair to opposite side.  Slide finger down scalp, gently separate top portion of hair, and flip it to the other side.

I'm parted, so now what?

Grab small sections of hair and twist to make ringlets (I only do this around my face)

A little tamer
Step 4:  At this point you have two choices:  diffuse or partially air dry.

If you want, of if you are especially busy, you can walk away and do something else for 30 minutes to let your hair partially air dry.  It still needs to be noticeably wet for the next part (around 50%-60%).

Otherwise, grab your diffuser, and let's get going.  There are a few tricks to using a diffuser, so I've made you a few gifs to help explain how to "hold" the hair with the diffuser and how to position the tool (and your head).  It's important to tilt your head towards the side you are drying so that the ringlet isn't stretched over your head, but is allowed to fall straight.  Hold the diffuser in each spot for 8-10 seconds.  If you move too fast, you'll cause your hair to frizz.  It's more like a curling-iron than a hairdryer at this point.  Dry to about 60%.

To dry the ends:
Start below the hair and come straight up, hold for 8-10 seconds and then grab a new spot.
This can also be done with your head upside down.

Step 5: Grab the hairspray.  Lightly grasp the top layers and spray non-aerosol hairspray on the roots all around your head.  Then, use your diffuser to dry the roots and add volume.  I usually go over each section only once or twice, because I just want to "set" the hairspray and not dry out my scalp.  My hair is usually 90% dry at this point.

Do your best to not break up the curls, and for heaven's sake do NOT push up from the bottom, because you will end up "fluffing" your hair and looking like you stuck your finger in an electrical socket.

 To dry the roots (for volume):
Start on the side of your head and stick the diffuser "fingers" onto your scalp.  Move the diffuser up a few inches to relieve the weight on the roots.

Step 6:  Admire your crazy, amazing hair.  Mine usually settles a bit after this, especially as it finishes drying.  When it's dry, I usually feel through it a bit and see if there's a spot that somehow didn't get any product.  If there is (there usually is), I spray a little more sprunch spray or an unscented aerosol hairspray on that section (otherwise it will puff up).  If you don't catch a section in time and it puffs up (hours later or the next day), just wet it down and reshape the curl and then add a little product (I usually just do a spritz of hairspray).  I also separate some of the curls if I end up with a Shirley-Temple-type ringlet, which happens occasionally.

Front

See that crazy stray in the back?  Just pull it down and tuck it in.
(those curls in the front are on their way to Shirley Temple)

Side

If you look at the clock in the background of these pictures, you'll see this took 17 minutes from start to finish, but I was also taking pictures.  It typically takes me about 10 minutes to do my hair in the morning.

Leave your questions in the comments.  Hope you enjoyed this series!

___________________________________________________________________

This post is part 1 of a series on how I style my curly hair. (I will update the links as the pages are posted)
Part 2:  How I wash my hair
Part 3:  How I style my hair

Friday, August 15, 2014

How I style my Naturally Curly Hair: Part 2

How do you wash your hair?  How often?  What products do you use?

I typically wash my hair every other day.  I know that many curlies wash their hair way less than that and I know some that wash their hair daily.  The reason I wash my hair every other day is because I think it gets "nappy" by the second day, and washing fixes that!

I only use sulfate free shampoo and conditioner on my hair.  Sulfates are the compounds that make regular shampoos wonderfully sudsy and are in all sorts of shampoos (and all prices).  They are really good at stripping everything off of your hair and making it feel "squeaky-clean", but, because of that quality, they also dry out your hair (they strip off all of the natural oils).  Curly hair tends to be drier and so "squeaky-clean" isn't really a good thing, the natural oils your scalp produces help keep your hair shiny and frizz free.

Up until now, sulfate-free shampoos were only available in salons and came with a fairly hefty price tag, but if you consider that I only wash my hair every other day, then I could reasonably afford a shampoo 2x as much as drugstore shampoo if I used to wash it daily.  I usually spend around $15 for a regular-sized bottle, or between $25 and $40 for a jumbo sized (many times I can find deals on the larger bottles).  Recently, I saw that L'Oreal now has a sulfate-free product for curly hair for around $7 a bottle.  I haven't tried it, but it's on my list when I run out of the Redken stuff.

Source: http://www.amazon.com/Styleshots-Shampoo-8-45oz-Conditioner-6-76oz/dp/B00C9H5Y6C/ref=sr_1_2?ie=UTF8&qid=1408050063&sr=8-2&keywords=tigi+hi+def+curls


The Shampoos:


The Conditioners:


So, here I am, product in hand.  Now what?  (I have no pictures for this part... for obvious reasons.)

How I Wash My Curly Hair:
  1. Wet hair thoroughly, shampoo as normal.  Occasionally, I shampoo twice if my hair was really dirty.  I know that the sulfate-free stuff is gentle on my hair so I don't worry about drying it out too much.
  2. Flip head over and squeeze out as much water as you can.
  3. Put a quarter-sized dollop of conditioner in your hand, spread it between both hands and scrunch it into hair starting at the ends.
  4. Comb the conditioner through hair with hands only and work it up to the roots (but try to get very little if any on the roots).  Continue combing until you have all of the tangles out.
  5. Twist hair into a high bun and secure with a hair tie.  Do not rinse.
  6. Finish doing whatever else you need to do in the shower.
  7. As the very last thing you do, flip your head back over and take out the hair tie.  Comb your fingers through your hair as you hold it under the shower stream.  Continue combing until you feel that 95% of the conditioner is rinsed out.
  8. Turn off the shower, squeeze all the water you can out of your hair with your hands.  Dry off.
  9. Wrap your hair in a towel for about 30 seconds, and no more than a minute.
  10. Unwrap and get ready to style, or twist it into a high bun until you are ready to style (no more than 15 minutes).
___________________________________________________________________

This post is part 1 of a series on how I style my curly hair. (I will update the links as the pages are posted)
Part 2:  How I wash my hair
Part 3:  How I style my hair

Thursday, August 14, 2014

How I style my Naturally Curly Hair: Part 1

What type of curly hair do I have?  How long have I had curly hair?  What kind of hairstyles worked on my hair?

I'm answering these questions in this post.  Whenever I see a "curly hair" post, I want to see lots of pictures so I know what type of curly hair the poster has.  If her hair is similar to mine, I will try her suggestions, but I know that there are many different types of curly hair and what works with one person may not work with another.

I have always had naturally curly hair, and as a child I sported some amazing hairstyles.

Or should I say Afros?

All cuteness aside, I come from a family of straight-haired people, so it took me several years to learn how to tame my hair.  I tried pomades, gels, serums, and creams of all kinds, from the drugstore and from the salon.  I never went through a straightener phase, like some girls have, because I kept my hair very long up until my junior year of high school, and have since varied between chin-length to mid-back length (my hair grows really fast).  These are a few examples of my hair type at varied lengths, using the method I will describe in my next two posts.

Chin Length

A few inches past shoulder

Very long

Angled Bob (Very Short in Back)

Whew, that was a lot (and I hate selfies, so I apologize).  Another thing important to look at is texture.  My hair is very fine, but I have quite a bit of it.  It is pretty much the opposite of coarse.  When I straighten it, it is smooth and glossy and doesn't even hold a curl.  The photo below is straightened with only a hairdryer and a flat iron; I didn't use any product because I was getting ready to donate it.

Curly vs. Straight
So, will my method work for you?  I hope so!  Your results will depend a lot on what type of hair you have, so that's why I spent so much time explaining what type of hair I have.

___________________________________________________________________

This post is part 1 of a series on how I style my curly hair. (I will update the links as the pages are posted)
Part 1:  What type of hair do I have?
Part 3:  How I style my hair

Friday, May 30, 2014

Friday Favorites 5/30/14

Today's Friday Favorites post is going to be outdoors themed, because my legs are still tired and my sunburn stings from my 11 mile hike yesterday.


  1. Danskin Now Women's Striped Performance Racerback Tank with Wicking, $6 at Wal-Mart (Pictured above)
    This tank is a steal.  It's showing online as $5, but I picked mine up a few days ago for $6.  Either way, it is a super-lightweight semi-fitted workout tank for mere pocket change.  I did not have high hopes because it seemed too good to be true, but it kept me cool all day yesterday and you can't beat the price.  (Note:  they do run large.  I bought a small, and I typically wear a med/large in workout tops.)
  2. Picaridin Bug Spray (Repel Tick Defense)
    I used to be all, "Gimme that 40% DEET!  Only the strongest will do!  I don't care if DEET melts plastic and poisons your pets, I HATE misquito bites!"  Then, I needed to buy some more bug spray for my hike yesterday, and since I have a healthy fear of ticks and Lyme disease, I picked up Repel's Tick Defense spray.  I was surprised to see that it had no DEET, so I did what any logical person would do, I Googled the active ingredient right there while standing in the aisle at Wal-Mart.  One of the first lines I read, "Picaridin is a repellent for mosquitos and other insects which is similar in effectiveness to DEET, but more pleasant to use and much less likely to cause skin irritation (source)."  Having recently partially dissolved the side of a water bottle with DEET, this sounded great to me.  The verdict:  It doesn't stink, none of my clothing was harmed (and I sprayed it all over), and I didn't have ANY ticks after my 5 hour hike through various grasses and trees probably swarming with ticks.
  3. Neutrogena Beach Defense Sunscreen
    This stuff smells amazing.  Like a smell you'd want to smell like even if you weren't putting on sunscreen.  Plus, it works (the sunburn I have is from where I neglected to apply sunscreen...).  I have both the lotion and the spray-on kind.

Friday, May 9, 2014

Friday Favorites 5/9/2014


Time for another installment of Friday favorites!
  1. C25K Free Running App by Zen Labs
    If you are not a runner (or, I guess, even if you are, but I cannot vouch for you), but you want to start, this app wonderful.  It will guide you through running workouts 3x per week for 8 weeks, and by the end you should be able to run a 5K race.  To start, I turn on some music (you can do this through the app), and then listen for the instructions--the app will tell you when to start running and when to start walking, and includes warm-up and cool-down time.  The only downside is it appears it's only available in the Itunes App Store, and that you have to take your phone with you when you run & wear headphones (but I already listen to music when I work out, so it's not a big deal for me).

    C25K App Main Screen

  2. Revlon Tourmaline/Ionic/Ceramic Hairdryer
    If you follow me on Instagram, then you might have seen that I recently got a new hairdryer.  For curlies, our hair is all so different and a tip that works for one person may not work for another, but for my fine-textured, but full head of curls, this dryer is amazing.  It dries my hair faster, keeps it looking shinier, and there is virtually no frizz to speak of.  All of that means that I can dry my hair almost completely (around 95%), whereas I used to only be able to dry it to about 60% before it would puff & the curls would lose shape.  It comes with a diffuser attachment, which is the only way I use it.

    Just look at those curls!

    This is a snip of my order history on Amazon so you'll know exactly what I bought.

  3. Harney & Sons Teas
    Mmmm.  I love a good cup of black tea.  I first tried these teas at a coffee shop called Bluestem Bistro, which is in the town I went to college in.  They have great flavors, and my favorites are Vanilla Black, Paris (a fruity black), and English Breakfast.  They also come in these gorgeous tins that make you feel like you are taking tea with Queen Elizabeth.

    These are the tea sachet tins, aren't they beautiful?

Thursday, May 8, 2014

Recipe: Grapefruit Blood Orange Jam

I honestly had no intention of sharing this recipe with you guys.  I love everything grapefruit, but I truly thought that the rest of the world wasn't as thrilled about this bitter citrus.  Maybe they aren't, but this jam has been taste-tested by quite a wide demographic and given hearty approval by all who've tasted it.


Here's the breakdown of people who've given the "thumbs up":

  • 10 month old baby
  • 7 yr. old boy
  • a variety of our adult friends
  • Handsome
  • Handsome's brother (who I would consider a foodie, and isn't afraid to tell me when I've made something nasty)
  • ME :)

I guess shouldn't hide this treasure in jars of glass!

The back story:

I cannot resist a bag a Blood Oranges when I see them at the grocery store.  If you've never seen/experienced them, they are similar to Navel oranges, but slightly smaller, sweeter, and usually have a mottled flesh that ranges anywhere from a light pinky-orange to blood red (hence the name).  So, apparently the grocer had blood oranges and also had grapefruits on sale at the same time.  The end.  (No one ever accused me of being good at telling stories guys, okay?)

My bonus jar -- it was gone very quickly.


Grapefruit Blood Orange Jam

By Molly Blue
makes 3 pints + a bonus jar (process in pints or 1/2 pints)


Ingredients

4 Grapefruit
8-10 Blood Oranges
a small amount of orange juice or lemon juice

4 c. white sugar
4 T. powdered pectin

Instructions


  1. Supreme the citrus fruit over a large measuring cup to collect the juices, drop in the fruit pieces as you cut them out, and squeeze the leftover membrane to get all the juice you can.  You need 5 cups of fruit + juice, if you have more than that, then pour off the excess and drink it (yum!), if you have less than that, add orange juice or lemon juice to reach 5 cups.
  2. Combine fruit + juice and pectin in a large non-reactive pot (make sure there are no pectin clumps), and mash the fruit pieces a bit with a potato masher or spoon.
  3. Bring juice to a hard boil that cannot be stirred down.
  4. Add sugar all at once, return to a boil and boil hard, stirring constantly, for one minute.
  5. Ladle hot jam into jars, leaving 1/4" headspace.  Wipe rim & center (simmered & softened) lids on jar.  Screw on bands.
  6. Place jars in cannner, making sure they are covered by 2" of water.  Bring canner to a boil and process for 10 minutes at sea level (I am above sea level, so I process for 15 minutes).  Turn off heat (and move the pot if you can do it safely) and cool 5 minutes in the water bath.  Remove to a folded towel and cool.  Refrigerate any unsealed jars after 24 hours of cooling.


Disclaimer:  If you have not canned before, see freshpreserving.com before making this recipe.  I am not responsible if you do something crazy like not following government approved safe canning methods.

Friday, May 2, 2014

Friday Favorites 5/2/14

I'm starting a new series here on GTMB, similar to posts you've most likely seen on other blogs, I'll be sharing some things I enjoy in (hopefully) weekly "Friday Favorites" posts.  I'm also planning on bringing back the "Farmer's Market" series as soon as the market picks up here in the Midwest, probably a few more weeks.

(The following are NOT affiliate links, nor was I paid or compensated in any way for these reviews, I just LOVE this stuff!)

  1. Mason Jar Drinking Lids
    The best thing about using these lids for your drinks is that if you are drinking coffee or hot tea in them, you can easily unscrew the metal band and reheat your drink if it cools.  All of my other travel mugs cannot go in the microwave (as an aside, I used to have a microwaveable mug, but it did a terrible job of keeping my drinks warm).  The other great part about them is that if you are a canner or use jars for storage, you already have the rest of the items needed (and if you don't have a mason jar, ask your friend who's a canner if they have any extra jars and bands, I've never had a problem finding free extra jars if I just ask around).
    My personal favorite (because I love championing small businesses) are Cuppow Jar Drinking Lids.  I've had mine for about a year and I LOVE using them.  I have a regular mouth clear lid and a (mysteriously disappeared) wide mouth orange lid.  They are BPA/BPS-free and a rigid, sturdy and thick plastic.  You can buy them online for around $9 each (free shipping, hooray!).

    Cuppow Regular Mouth, Soaking in the rays
    Cuppow Wide Mouth, Perfect with some hot tea!

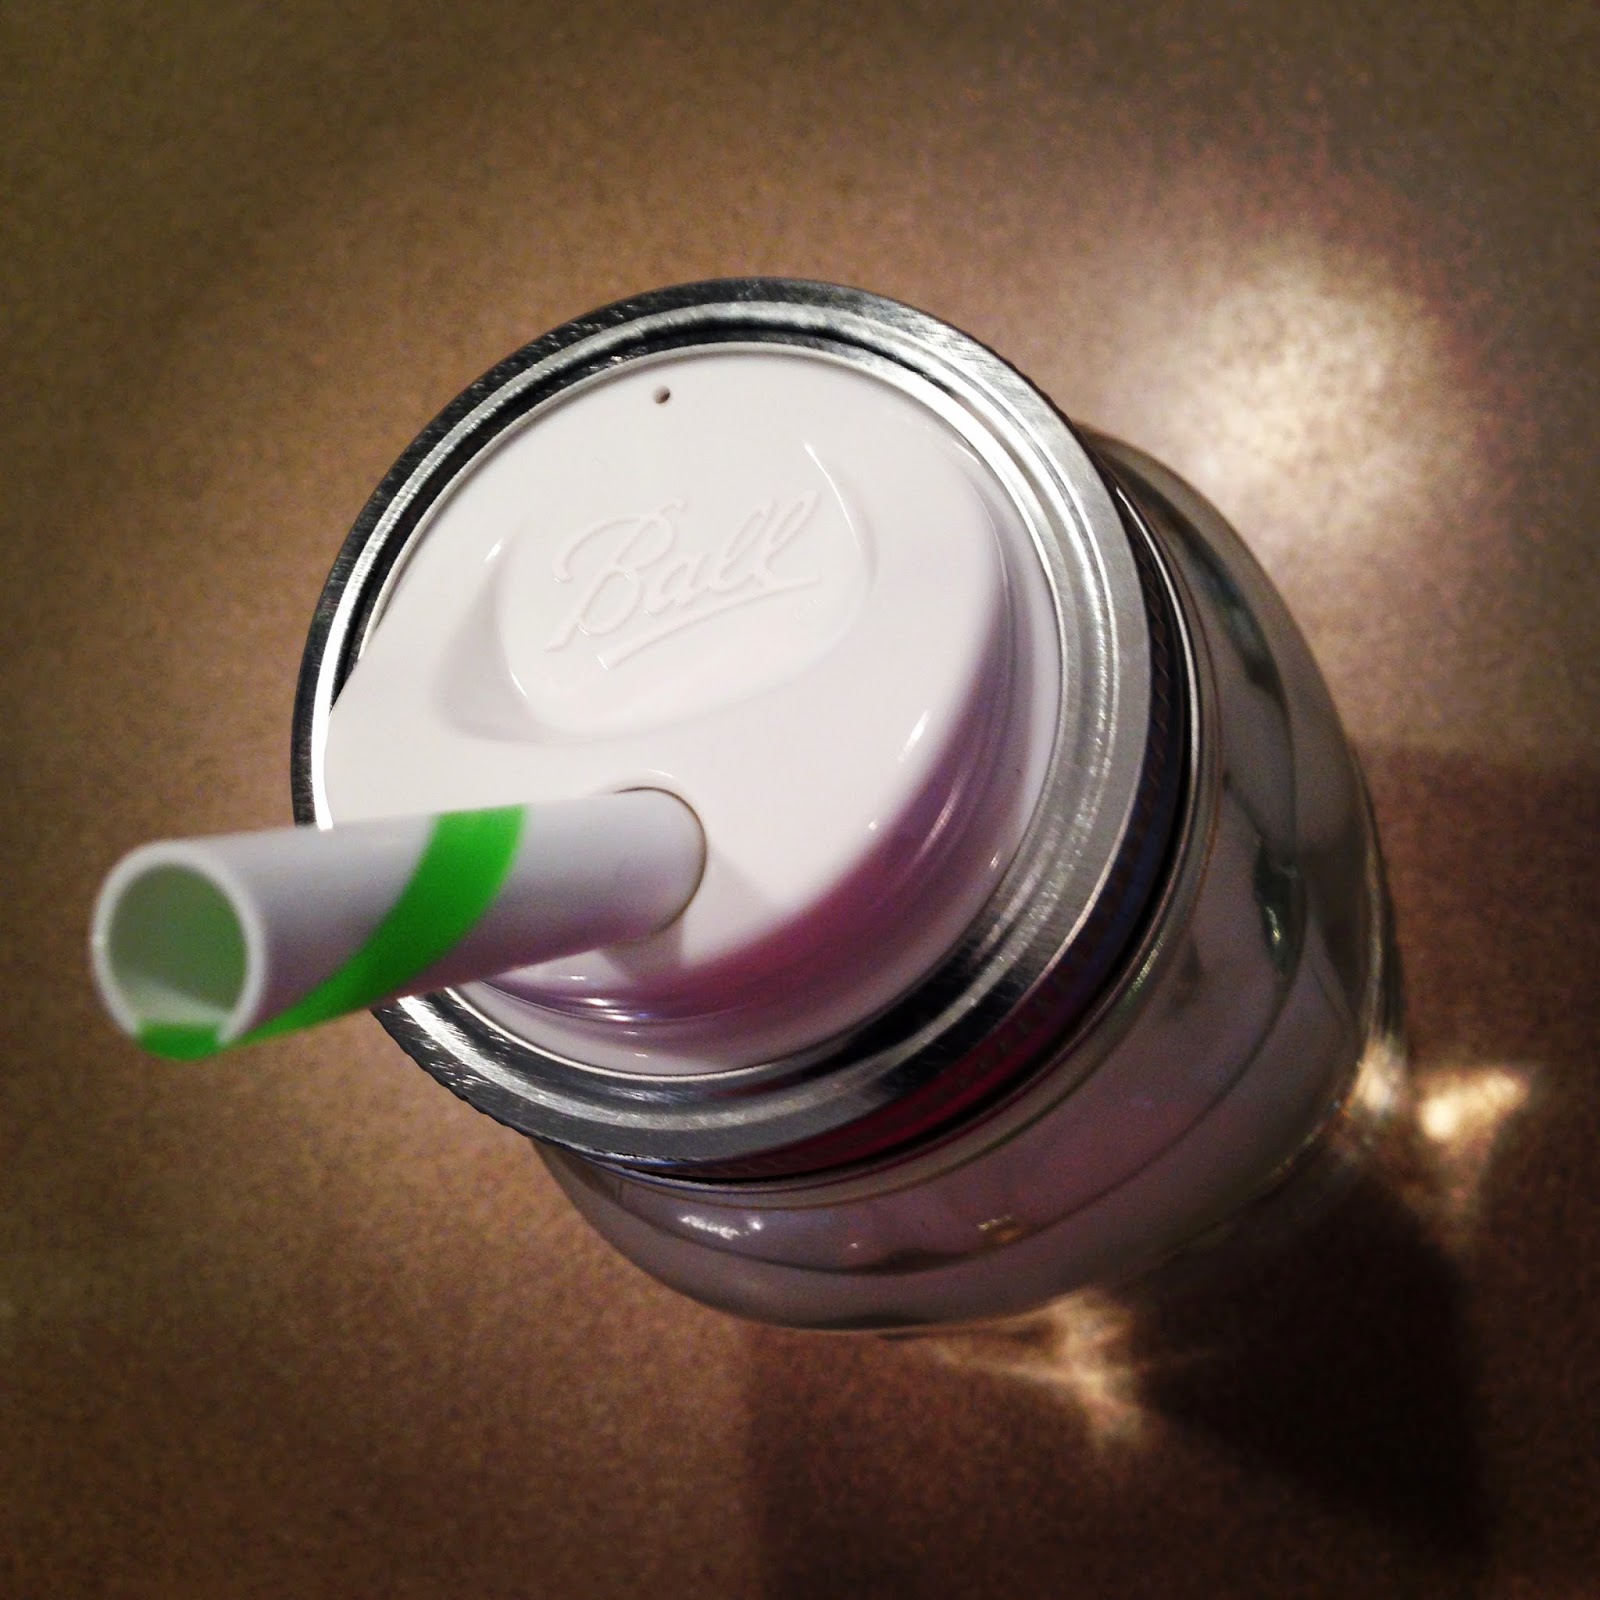
    Recently, Ball (one of the largest producer of mason jars) came out with their Sip & Straw lids, which are very similar to the Cuppow lids, except they have a large circular opening and come with a straw.  They come in a 4-Pack, which I found at my local grocer for less than the price listed online (I think around $6), so they end up being the cheaper option.

    Handsome calls this my "sippy cup," whatevs.

  2. Sally Hansen Insta-Dri Top Coat
    I am already on my 3rd bottle of this stuff, because it's so amazing.  Your nails will be dry to the touch in 30 seconds after applying this top coat--NO KIDDING!  I use it every time I paint my nails, because it dries quickly and also is super glossy.  I typically get a week's wear using this top coat, along with a good base coat and 2-ish coats of nail polish.  So, if you're looking for a salon-quality finish, long wear AND quick-dry, this stuff is the bomb.com.  I get this magic potion at my local big box store for about $5 a bottle.

    My at-home pedis last 3-4 weeks!
    (I usually repaint b/c of regrowth, not polish chipping)
  3. Mark Driscoll's "Jesus Loves His Church" Sermon Series
    I am working on my second time through this series.  I have found it very convicting and full of great illustrations, and I cannot stop talking about it to my IRL friends (have ya'll gone and listened yet???).  I have the Mars Hill app on my phone, which makes it very easy to turn on a sermon while I clean my house (truly the only way I get housework done).  As the website explains it, "To know Jesus is to know his church. And to love Jesus is to love his church. This is why, as Christians, we must wrestle with what it means to be the church, not just with our ideas of it. In this sermon series, Pastor Mark spends 11 weeks exploring what the church is, why it exists, and what it means for us."  Just. Go. Listen.

Thursday, March 6, 2014

Recipe: Poblano Peach Jam

Note: I wrote this last summer and promptly forgot about it.  Sorry to post it out of season, but I thought this would give you time to get your Poblano plants going this spring.

"Okay, fine, you can pick one weird one for us to plant."

So I carefully examined the choices, and with visions of chile rellenos dancing in my head, I grabbed a Poblano pepper plant, "THIS one!"

Chipped nails, don't care.

This past spring we planted the Spare communal garden at Handsome's parent's house out in the country.  We had the usual suspects:  tomatos, bell peppers, jalapenos, zucchini, squash and cucumbers.  AND, with my sweet-talking skills and promises of culinary adventure, we also planted Garden Salsa peppers and a lone Poblano pepper plant.

Is it August yet, so I can get my peaches?

Turns out that Poblano pepper plants love the sandy soil and the cooler summer weather we had this year, so we have been inundated with these little guys.  No one else really knows what to do with them, so I have taken most of the bounty home with me.  And, I never though I'd say this, but there are only so many cheese-stuffed Poblanos that a girl can eat.

I need to stop taking these pics with my phone... sorry about the color situation.

So, I came up with this recipe.  And it is tasty.  Normally I don't eat hot pepper jelly on toast, but I might make an exception for this one.  It is sweet from the peaches and has a medium heat-level.  In addition to toast, this would be great with crackers and soft cheese or as a glaze on grilled or roasted meats (chicken, fish, maybe even pork or beef).

It really does taste good, even though it looks like alien goo.

Poblano Peach Jam
by the Spares

3 c. Chopped Peaches (skins removed)
1 c. Minced Poblano Peppers (leave most of the seeds in)
3 T. Bottled Lemon Juice
1 T. Cider Vinegar (5% acidity)
4 T. Powdered Pectin
3 c. Sugar

Instructions:

  1. For Canning:  sanitize jars, place in canner (if you didn't sanitize them in the canner) to warm.  Place lids in small pot and soften according to package directions.
  2. Mince Poblanos (with most of the seeds) in a food processor with the vinegar.
  3. Add Poblanos to a non-reactive pot with the peaches, lemon juice and pectin.  Stir to combine.
  4. Bring mixture to a boil (that cannot be stirred down), stirring constantly.
  5. Add sugar all at once.  Stir to dissolve and bring again to a boil (that cannot be stirred down).  Boil hard 1 minute, stirring constantly.
  6. Remove jam from heat and cool 5 minutes.  Stir and put into jars.  (Wipe rims, center lids, adjust bands to fingertip tight, etc., etc.)
  7. Process jars 15 minutes (for altitudes 1,001 to 3,000 ft.).
  8. Cool jars in canner 5 minutes before removing to avoid siphoning.
  9. Place jars on a folded towel or cooling rack in a draft-free place to cool for 12-24 hours.
  10. Refrigerate and use immediately any jars that did not seal.

Note:  This recipe follows the instructions on the Ball Pectin jar and is not just made up from nowhere.  If you have not canned before, see freshpreserving.com before making this recipe.

Yeah, I did.  So what?