Sunday, October 5, 2014

Dinner Meal Plan: Week of 10/5/2014 (With Recipes)

I don't know if this will be helpful for anyone, but I usually spend an hour or so each Sunday or Monday planning 3-4 meals for the week (depending on what leftovers we already have and what each recipe yields) and then buy all of the groceries I need for the week.  I look at the grocery store's weekly ad, but don't always choose to buy from it.  I usually plan to make something with leftovers at the beginning of the week for lunches.  This week is a little different, because we made two pizzas today and can have leftover pizza and fruit for lunches early this week.  I also try to plan quick or slow cooker meals for the days I'm working so that we can eat soon after we get home (dinner is usually at 5:30 at my house!).

I looked through my refrigerator and freezer to help me plan meals this week.  I saw that I have some eggs that need to be used up.  I also stumbled upon some game bird in the freezer (Chukar).  I can usually find a lot of, um... inspiration (?) this way.

Sunday/Monday Prep:
  • I often buy a head of Romaine (or "green lettuce" as my grocery store calls it) and wash and chop it on the day I buy it.  I store it in a gallon storage bag with a paper towel and I try to have as much air in the bag as I can.  It's 99 cents per head of lettuce, which is way cheaper than a bag, and it lasts quite a bit longer.
  • Wash, prep, and portion fruit &/or veggies in small containers to grab for lunches
  • Homemade yogurt cups in small containers:  1 serving greek yogurt, chia seed jam scooped on top (to taste, depends on how sweet it is)

Monday:
Chukar Piccata, Angel Hair Pasta, Green Salad
(note: Chukar is a game bird.  Chicken is typical in this recipe)

Tuesday:
Cobb Salad (lettuce, chopped ham/turkey, hard boiled egg, shredded cheddar, red peppers, avocado, shredded carrots, green onion, olives, bacon, ranch dressing)

Wednesday:
Slow Cooker Pasta Bake (I won't use a recipe, but something like this, probably with broccoli & cauliflower)

Thursday:
Leftovers

Friday:
Irish Beef Stew (Slow Cooker)


What are you having this week?

Thursday, May 8, 2014

Recipe: Grapefruit Blood Orange Jam

I honestly had no intention of sharing this recipe with you guys.  I love everything grapefruit, but I truly thought that the rest of the world wasn't as thrilled about this bitter citrus.  Maybe they aren't, but this jam has been taste-tested by quite a wide demographic and given hearty approval by all who've tasted it.


Here's the breakdown of people who've given the "thumbs up":

  • 10 month old baby
  • 7 yr. old boy
  • a variety of our adult friends
  • Handsome
  • Handsome's brother (who I would consider a foodie, and isn't afraid to tell me when I've made something nasty)
  • ME :)

I guess shouldn't hide this treasure in jars of glass!

The back story:

I cannot resist a bag a Blood Oranges when I see them at the grocery store.  If you've never seen/experienced them, they are similar to Navel oranges, but slightly smaller, sweeter, and usually have a mottled flesh that ranges anywhere from a light pinky-orange to blood red (hence the name).  So, apparently the grocer had blood oranges and also had grapefruits on sale at the same time.  The end.  (No one ever accused me of being good at telling stories guys, okay?)

My bonus jar -- it was gone very quickly.


Grapefruit Blood Orange Jam

By Molly Blue
makes 3 pints + a bonus jar (process in pints or 1/2 pints)


Ingredients

4 Grapefruit
8-10 Blood Oranges
a small amount of orange juice or lemon juice

4 c. white sugar
4 T. powdered pectin

Instructions


  1. Supreme the citrus fruit over a large measuring cup to collect the juices, drop in the fruit pieces as you cut them out, and squeeze the leftover membrane to get all the juice you can.  You need 5 cups of fruit + juice, if you have more than that, then pour off the excess and drink it (yum!), if you have less than that, add orange juice or lemon juice to reach 5 cups.
  2. Combine fruit + juice and pectin in a large non-reactive pot (make sure there are no pectin clumps), and mash the fruit pieces a bit with a potato masher or spoon.
  3. Bring juice to a hard boil that cannot be stirred down.
  4. Add sugar all at once, return to a boil and boil hard, stirring constantly, for one minute.
  5. Ladle hot jam into jars, leaving 1/4" headspace.  Wipe rim & center (simmered & softened) lids on jar.  Screw on bands.
  6. Place jars in cannner, making sure they are covered by 2" of water.  Bring canner to a boil and process for 10 minutes at sea level (I am above sea level, so I process for 15 minutes).  Turn off heat (and move the pot if you can do it safely) and cool 5 minutes in the water bath.  Remove to a folded towel and cool.  Refrigerate any unsealed jars after 24 hours of cooling.


Disclaimer:  If you have not canned before, see freshpreserving.com before making this recipe.  I am not responsible if you do something crazy like not following government approved safe canning methods.

Thursday, March 6, 2014

Recipe: Poblano Peach Jam

Note: I wrote this last summer and promptly forgot about it.  Sorry to post it out of season, but I thought this would give you time to get your Poblano plants going this spring.

"Okay, fine, you can pick one weird one for us to plant."

So I carefully examined the choices, and with visions of chile rellenos dancing in my head, I grabbed a Poblano pepper plant, "THIS one!"

Chipped nails, don't care.

This past spring we planted the Spare communal garden at Handsome's parent's house out in the country.  We had the usual suspects:  tomatos, bell peppers, jalapenos, zucchini, squash and cucumbers.  AND, with my sweet-talking skills and promises of culinary adventure, we also planted Garden Salsa peppers and a lone Poblano pepper plant.

Is it August yet, so I can get my peaches?

Turns out that Poblano pepper plants love the sandy soil and the cooler summer weather we had this year, so we have been inundated with these little guys.  No one else really knows what to do with them, so I have taken most of the bounty home with me.  And, I never though I'd say this, but there are only so many cheese-stuffed Poblanos that a girl can eat.

I need to stop taking these pics with my phone... sorry about the color situation.

So, I came up with this recipe.  And it is tasty.  Normally I don't eat hot pepper jelly on toast, but I might make an exception for this one.  It is sweet from the peaches and has a medium heat-level.  In addition to toast, this would be great with crackers and soft cheese or as a glaze on grilled or roasted meats (chicken, fish, maybe even pork or beef).

It really does taste good, even though it looks like alien goo.

Poblano Peach Jam
by the Spares

3 c. Chopped Peaches (skins removed)
1 c. Minced Poblano Peppers (leave most of the seeds in)
3 T. Bottled Lemon Juice
1 T. Cider Vinegar (5% acidity)
4 T. Powdered Pectin
3 c. Sugar

Instructions:

  1. For Canning:  sanitize jars, place in canner (if you didn't sanitize them in the canner) to warm.  Place lids in small pot and soften according to package directions.
  2. Mince Poblanos (with most of the seeds) in a food processor with the vinegar.
  3. Add Poblanos to a non-reactive pot with the peaches, lemon juice and pectin.  Stir to combine.
  4. Bring mixture to a boil (that cannot be stirred down), stirring constantly.
  5. Add sugar all at once.  Stir to dissolve and bring again to a boil (that cannot be stirred down).  Boil hard 1 minute, stirring constantly.
  6. Remove jam from heat and cool 5 minutes.  Stir and put into jars.  (Wipe rims, center lids, adjust bands to fingertip tight, etc., etc.)
  7. Process jars 15 minutes (for altitudes 1,001 to 3,000 ft.).
  8. Cool jars in canner 5 minutes before removing to avoid siphoning.
  9. Place jars on a folded towel or cooling rack in a draft-free place to cool for 12-24 hours.
  10. Refrigerate and use immediately any jars that did not seal.

Note:  This recipe follows the instructions on the Ball Pectin jar and is not just made up from nowhere.  If you have not canned before, see freshpreserving.com before making this recipe.

Yeah, I did.  So what?

Monday, May 6, 2013

Recipe: Strawberry/Blackberry Chia Seed Jam (Or How to Dye Your Wooden Spoon in 15 Minutes)

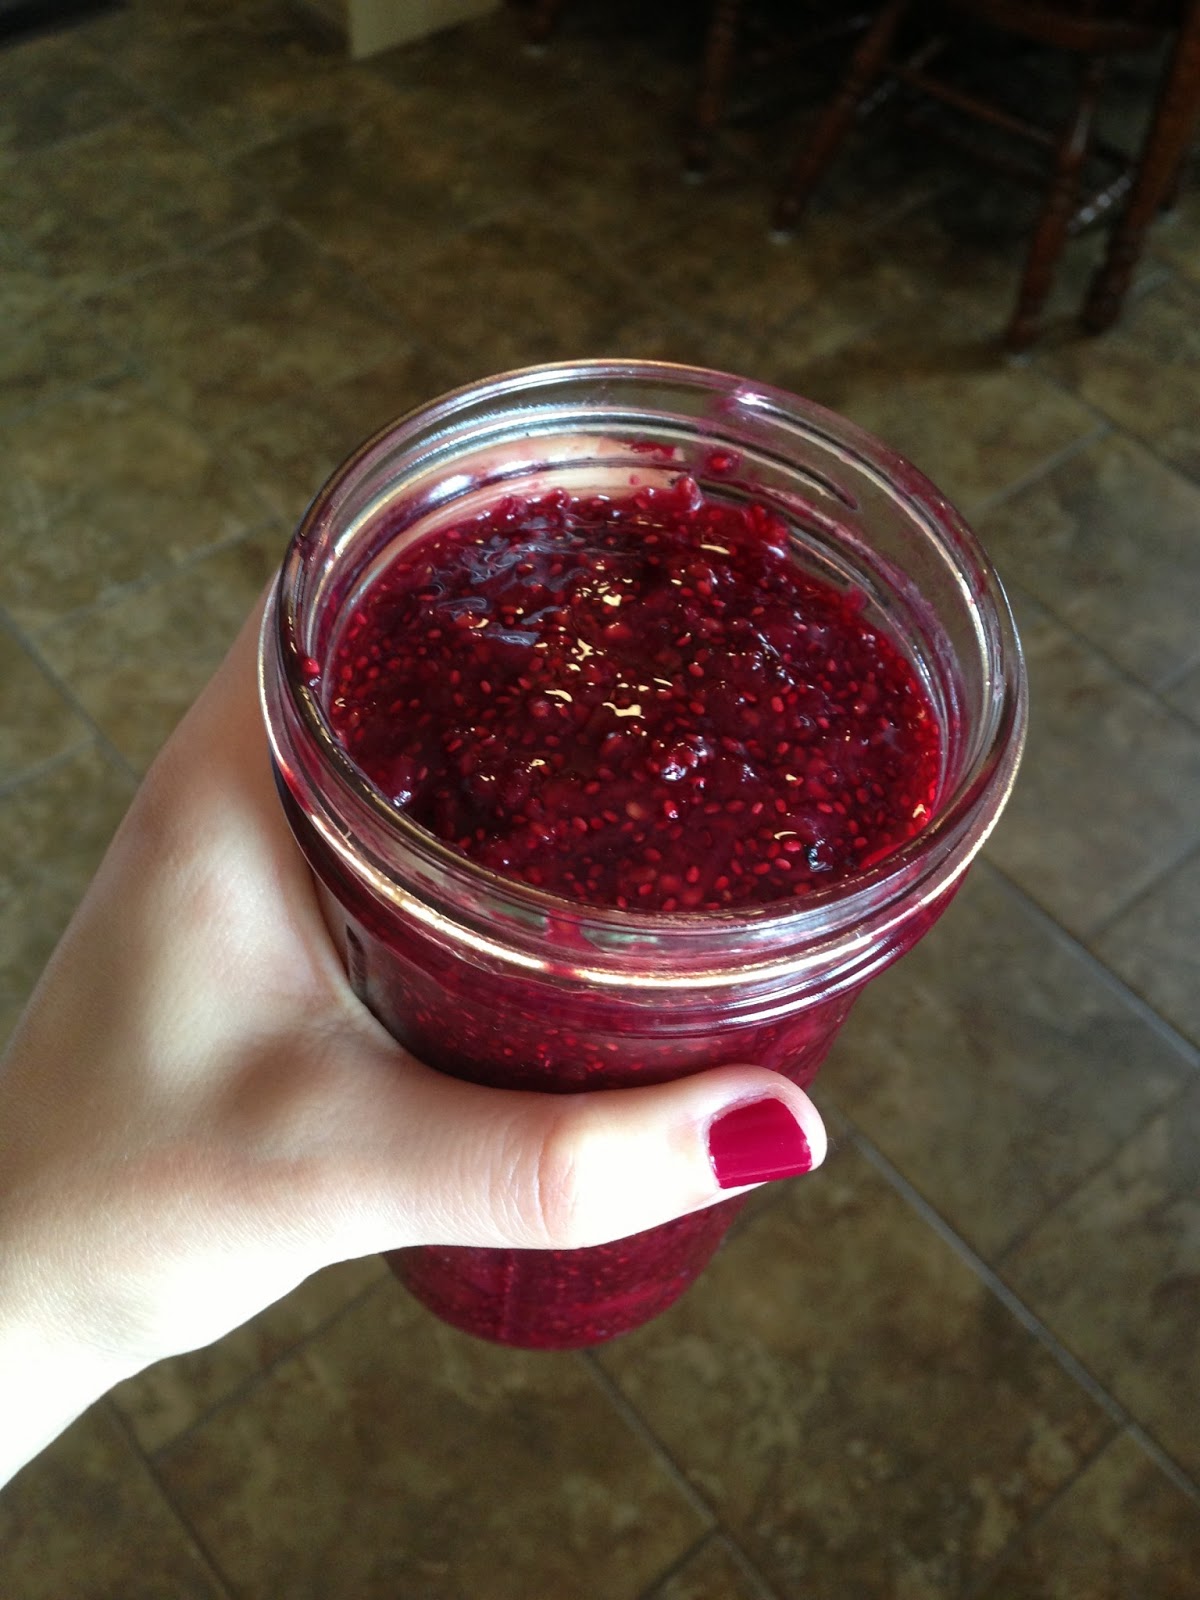
Pinterest is one of the coolest inventions of this century. I find the most interesting things while browsing--things I never would have thought of otherwise! A more recent discovery was Chia seed jam. Now, historically, I have not been a jam person. "I'll take a PB&J, please, hold the J." It's usually very sweet, contains no recognizable fruit, and has a strange consistency (I get freaked out by things that hold their shape when they come out of their container). BUT, this recipe had Chia seeds in it, and if you don't know, they have this strange property where when they're exposed to water, they swell and form a gelatinous outer layer. This makes them incredibly cool (in a science experiment-y kind of way) aaaaaand perfect for instant jam!


Now, as far as I know, you shouldn't try to can this recipe. It's more of a freezer-jam-style recipe (although I haven't frozen it yet, so I don't know how well that would work). Contact your local Extension Agent before you try canning this to make sure it's safe.


I stuck pretty close to the original recipe, but then again, that's easy to do when there's only four ingredients! And it's hard to mess up when there's only four ingredients!  And there's no worry about the perfect sugar/pectin ratio.  I'm pretty sure this jam will set every time.  Every. Time.  (Can I get a Hallelujah?)  Oh yes, aaaaaaaand it tastes like REAL FRUIT!  (Hallelujah!)


Strawberry/Blackberry Chia Seed Jam

By the Spares

Adapted from Magical Blueberry Vanilla Chia Seed Jam by Oh She Glows


16 oz. Fresh Strawberries, chopped in 1/4" pieces
12 oz. Fresh Blackberries
1/4 to 1/3 c. Sugar (depending on the sweetness of your berries)
2 T. Chia Seeds

Combine fruit and sugar in a medium pot on medium heat.  Smash berries with a wooden spoon and cook until juice comes to a low boil.

Stir in Chia seeds and simmer for 15 minutes, until jam is thick.

Notes:
1. Store in an airtight container.  Lasts 1 week in the fridge.
2. I like to enjoy this on buttered toast or stirred into plain Greek yogurt! (Hallelujah!)
3. I found a big bag of Chia seeds at my local organic food supply store.

Tuesday, April 30, 2013

Recipe: Brisket Tacos

The first time I had a Brisket Taco was in Dallas on the recommendation of our friends (I think it was this place).  Handsome and I had never even heard of such a thing (and we consider ourselves pretty well-versed on Mexican/Tex-Mex/Kans-Mex food, since we live in the same town as so many REAL Mexicans).  They.  Were.  Amazing.  It's like all of the things I love about brisket and about Mexican food rolled into one, juicy taco!


We go classic when we eat these at home.  Warm tortillas slathered with sour cream, pile the meat high, scatter chopped cilantro, some salsa or purple onion, squeeze a lime on top and it's go-time.  Honestly, though, this meat's pretty great in a regular sort of taco, too.  It reminds me a lot of Chipotle's Barbacoa, but a little less spicy.  However you decide to eat it, just get-going and make it, because it's tasty!


Brisket Tacos
by The Spares

3-4 lb. Brisket*
6 Chipotle Peppers (from canned Chipotles in Adobo sauce)
1-3 T. Adobo Sauce (from can)
4 c. Beef Broth
6 cloves Garlic, peeled
2 T. Cumin
2 t. Oregano
Salt & Pepper

Optional:  Heat smoker to 250 degrees F with your favorite wood--my husband likes to use Walnut.  Liberally salt and pepper both sides of the brisket and smoke for 2 hours (we're not trying to cook it here, just get some smoke flavor).

Combine peppers, Adobo sauce, garlic, cumin, oregano and 3 T. broth in a food processor.  Process until smooth and set aside.

At this point you can use a slow cooker or your oven.  If using your oven, preheat to 300 degrees F.

Place (smoked) brisket in a slow cooker insert or roasting pan.  Spread Chipotle sauce on top of brisket and pour broth around the sides.  If using oven, cover roasting pan tightly with foil.  For both oven and slow cooker, cook on low for 8-10 hours, until brisket shreds easily with a fork.

Remove brisket from pan onto a large platter or cutting board.  Shred with two forks (be careful, it's hot!).  Moisten the shredded meat with some of the sauce.  You probably need to use at least half of the juices.  For a spicier taco, reduce pan juices by boiling them in a pot on the stove for 10-20 minutes, and use all of the juices to moisten the meat.

Serve on warm tortillas with sour cream, cilantro, diced purple onion, homemade salsa, and a squeeze of lime juice!

*I can usually buy a half brisket (8-12 lb) at the local packing plant and save half for later.  This freezes very well, so don't worry if you can only find a large piece of brisket.

Tuesday, August 28, 2012

Recipe: Raw Granola (Swedish Museli)

I am such a big fan of breakfast.  Before we were married, Handsome infrequently ate a granola bar before his first class, but now I've convinced him to start every day off right.  Breakfast helps you wake up, starts your metabolism going, and doctors say that breakfast-eaters have a healthier weight than non-breakfast eaters.  (Have I convinced you yet?)

I love cold cereal.  I could eat it for every meal, but I find that a lot of the cereal at the grocery store is too sugary for me (either that or it's like tiny pieces of cardboard).  This Swedish Museli is perfect for me.  The oats are soft with a little bite, the nuts and apple give it a nice crunch and the fruit makes it just the right amount of sweet.  I hope you enjoy this easy, healthy breakfast as much as I do!


Raw Granola (Swedish Museli)
by Lauren Spare

1 c. Dried Cranberries
2 c. Old Fashioned Oats (not instant)
2 Apples, grated
3/4 c. Sliced or Slivered Almonds (toast for more flavor)
3 1/2 to 4 c. Milk

Mix all ingredients in a large bowl with a tight-fitting lid. Let sit overnight or for several hours before serving.

To eat: scoop a portion into a bowl. Top with sugar or honey to sweeten, add additional milk or some yogurt, to taste.

Museli will last a week in the fridge.

Saturday, October 1, 2011

Recipe: Homemade Granola

I think I've made this recipe a hundred times.  It is magical.  Even if you don't think you like granola, you will probably like this.  Once, a friend's parent sent me a box of granola ingredients so that I could bake granola for my friend.  It's that good.  (It really happened... isn't that funny?)


This is based on Pam Anderson's recipe.  Not the anatomically disproportionate blonde TV star, but the amazing cook with great, approachable recipes.  Check out the link for many, many, many variations on her basic granola recipe.


The original copy straight from USA Weekend magazine

I'll do a step-by-step for this, mostly because I remembered to take (not so good) pictures.  So, let's begin!


Here's all that you will need, unless you are gluten-free (see my note at the bottom -- you won't use wheat germ) or diabetic (again, see notes at the bottom for what I've done).


Mix all of your dry ingredients in a large bowl.


Measure the oil into your 1/4 cup measure, you'll thank me later...


Mix all of the wet ingredients in a small sauce pan and simmer just to warm everything up and help it combine.


And if you followed my advice, the syrup with slide right out of your measuring cup!


Nothing exciting will happen in the sauce pan.  Just warm it up, the oil will still be separate from the other ingredients.


Pour the wet over the dry, and wonder how I could take such a sick picture (I left the flash on... oops!).


Stir it all up and pour it onto your greased baking sheet.


Here is where I deviate from Pam.  She suggests "clumping" it with your hands, but I found I get the best clumps if I lightly spread it out flat to cover the sheet (but don't pack it down).


After 30 minutes, add these on top.


Use a spoon to gently break up the oat mixture and mix in the cranberries.  There's no stirring happening, just gentle, gentle mixing.  You don't want to break up those clusters too much just yet.


When you're done, it will look like this.  Not stirred, just lightly rustled.  A little pushed around, ya know.  Not harassed.  Be gentle! :)


I usually let it cool on the sheet, you can also pour it out onto wax paper to let it cool.  Once cool, break up any clusters that are too big for you and store in an airtight container.


Cranberry Vanilla Almond Granola


2 cups Old-fashioned Oats
½ cup Wheat Germ
2 Tbsp Dark Brown Sugar
¼ tsp Salt
¼ cup Dark Corn Syrup
3 Tbsp Canola Oil
1 Tbsp Water
1/2 cup Sliced Almonds
1 cup Dried Cranberries
2 t. Vanilla Extract (not imitation)
1. Adjust oven rack to middle position, and heat oven to 275 degrees F (135 degrees C). Coat a 9-by-13-inch metal pan with cooking spray, then set aside.
2. Mix oats, wheat germ, brown sugar, salt and almonds in a bowl. Bring syrup, oil, water and vanilla to a simmer in a saucepan over low heat. Drizzle over oat mixture, and stir to combine.
3. Pour mixture onto prepared pan. Pat into a flat layer. Bake for 30 minutes, but check at 20. Break up layer and gently stir in dried cranberries and continue to bake until golden brown, about 15 minutes longer. Let cool. (Granola can be stored in an airtight tin for up to two weeks.) Makes one quart.

TIPS:
  • LIGHTEN UP:  Replace 1/2 c. of oats with 1/2 to 1 c. of rice krispy cereal.
  • GLUTEN FREE:  Replace wheat germ with pulverized oats (I put 1/2 c. of oats in my food processor and process until it turns into a fine meal.)
  • SYRUP:  Any syrup will work, really.  Pam suggests maple, but I'm cheap so I use corn syrup.
  • DIABETIC:  Use sugar-free syrup and splenda brown sugar (using 1/2 the amount).

ADDITIONAL FLAVORS:

  • REESES:  1/2 c. chopped peanuts, 1/2 to 1 c. chocolate chips (add when granola is cool), 1 T. peanut butter (instead of vanilla)
  • CINNAMON WALNUT or PECAN:  1/2 c. chopped walnuts or pecans, 1 t. cinnamon (instead of vanilla)
  • GORP:  1/2 c. chopped peanuts, 1/2 c. sunflower seeds (shelled), 1/2 c. mini M&M's (added when granola is cool) , 1 T. peanut butter (instead of vanilla)

Thursday, September 22, 2011

Recipe: Apple Nectarine Crisp

You know what?  Marriage is a wonderful thing.  Two people coming together and becoming one flesh.  Each person brings all of their life experiences, traditions, hopes, fears, expectations, sins, etc.  It's the beautiful and messy juxtaposition of two lives, and I am overcome with how wonderful it is.


My husband brought his love of peaches into our marriage.  He has taught me the joy of a bowl full of juicy, sliced peaches shared with someone you love.  (However, it would take a pretty large bowl to hold enough for the both of us...)  Before I was married, apples were my favorite fruit.  I usually ate at least one apple a day, and didn't get tired of it.  Now, peaches are my new favorite fruit, joining apples & tying for the #1 spot in my heart.


This apple nectarine cobbler is pretty darn close to the marriage of my two favorite fruits.  Nectarines have a nice skin, though, so they worked better for this than peaches would have.  Always peel peaches when you cook them.  It's a life rule of mine.

So, without further ado, the recipe:


Apple Nectarine Cobbler
by Lauren Spare

Filling:
2 Med. Apples (I used Gala, but use what you like), sliced
2 Med. Nectarines, sliced
1/3 c. White Sugar
1 T. Corn Starch
1 T. Lemon Juice

Topping:
1/2 c. Rolled Oats
1/2. c. Whole Wheat Flour
1/4 c. Turbinado Sugar (or sub another kind and use a little less)
1/4 t. Salt
1 1/2 t. Cinnamon
2 T. Melted Butter
2-3 T. Canola Oil

  1. Preheat oven to 350 degrees.
  2. Stir together filling mixture and set aside.
  3. Stir together dry ingredients of topping.  Drizzle butter and 2 T. oil over the top.  Stir together and add additional oil if mixture isn't coming together (there should be no dry bits at the bottom).
  4. Pour filling into a 1 1/2 qt. casserole dish and sprinkle topping over it.
  5. Bake for 30 minutes, or until topping is browned and fruit juice is bubbling.
Notes: I didn't peel my fruit, since the peel has extra nutrients, but do whatever your heart tells you.  Handsome preferred them peeled.  Also, I used whole-wheat because I wanted to feel like it was sort of healthy... again, follow your heart (belly).


ENJOY!

Thursday, August 11, 2011

Recipe: Tatertot Casserole (Sans Canned Cream Soup!!!)

Ah, dear memories of my grade school cafeteria lunches.  My favorite meals were (HUGE) homemade cinnamon rolls with chili (notice what's listed first there...), cheeseburger stromboli,  and... tatertot casserole!  Such a humble casserole, really.  Comfort food at its finest.


Fast forward to now.  A few weeks ago I had a craving for tatertot casserole, the creamy, beefy goodness topped with crunchy tatertots.  But one thing stood in the way... canned cream of mushroom soup.  Over the years I've developed a mild distaste for canned cream soups--chock full of sodium and they keep the shape of the can when you dump them out (a non-Newtonian fluid, by the way).

I tried buying "Lite" soup and making a casserole, but it was bland.  No amount of additional salt or pepper could salvage it.  I was quite disappointed.

Luckily (for my tummy), I didn't give up.  Tonight, I set out to make my own "cream soup" sauce for casserole.  No half-pint gelatin salt-block "soup" was going to stand in my way!!!


Guess what!  This time I was successful.  As full of flavor as comfort food gets, and both Handsome and I had extra helpings!

Tatertot Casserole
by the Spares

1 lb. ground beef
2 1/2 c. frozen green beans
1 medium yellow onion, chopped
3 T. butter
3 T. flour
1 c. beef broth*
1/8 t. dried thyme
1/8 t. black pepper
3/4 c. milk
1/4 c. parmesan cheese (optional)
1 lb. frozen tatertots (1/2 of a 32 oz. bag)

Preheat oven to 400 degrees.  Spray an 8x8 baking dish with nonstick spray (or a deep-dish 9" pie pan).

Brown ground beef in a large skillet.  Drain and pour beef in baking dish.  Spread the (still frozen) green beans over the ground beef in the baking dish and set aside.

Melt butter in the skillet you used earlier.  Saute onions until translucent, about 2 minutes.  Stir in flour and cook for 5 more minutes, stirring often.  Add broth, milk and spices.  Heat to a low boil and cook until thickened, stirring often.

Pour sauce over beef and green beans in the baking dish.  Top with parmesan cheese (if using) and spread tater tots on top in one even layer.

Bake for 20-30 minutes, until tatertots are brown and sauce is bubbling.  Let cool 10 minutes before serving.  Enjoy!!!

*You could replace part of the broth with wine, if you like.  This would work great if you used low-sodium broth, because wine helps food taste salty (without the added salt).

Wednesday, August 10, 2011

Farmer's Market: Fennel (Plus Heirloom Tomatos & Okra)

Fennel is a whitish bulb with long, light-green stems and feathery leaves.  I cut the stems off before I remembered to take a photo, but here's what my bulb looked like.


Raw fennel is crisp with a spicy, black licorice taste.  When cooked, it (supposedly) loses the harshness and takes on a soft nutty flavor.  After some research, I chose Rachel Ray's Good Fennels Pasta, because she hadn't let me down before!

As I was cooking, I uttered the famous last words, "I hope this is good... because this recipe is making a LOT!"


Turns out that I must have done something wrong.  It wasn't very good.  Salvageable, but not good.  Not enough sauce and the fennel wasn't soft like the onions and peppers were...  I added an extra two cups of tomato sauce and some parmesan cheese and baked it for 30 minutes, which helped, but it was still a crunchy-licoricely-studded fennel minefield.


In the end, I've learned that there are only a few foods that I will pick off of my plate:  blueberries, blue cheese, and now... fennel.  (And, believe me, I have been picking and picking during lunch this week... ah, leftovers.)

I'm not done, though.  Maybe next year I'll get up the courage to try it again...

On the bright side, the next night we had hamburgers topped with a thick slice of an heirloom tomato (in place of ketchup, for me).  They were delicous!  I ate the rest of the tomato with some salt and pepper!


We also bought a pound of okra, and I fried it to go with the hamburgers.  I adapted Paula Deen's recipe, but it turned out to be a little bland for us.  Nothing salt couldn't fix, though!


Tuesday, July 26, 2011

Farmer's Market: Shallots

My favorite vegetable is onions.  Hands down.  They are so versatile: salsa, soups, sandwiches, salads, casseroles, omelettes, cake... well, maybe not cake.  Anyway, I thank my mother for my love of onions.  She's Italian, and she cooks like it (minus the garlic)... there's onion and green pepper in most of the family recipes, and, growing up, we always had those two veggies on hand.

Last Saturday, I ventured alone to the farmer's market.  It shouldn't surprise you that I bought a box of small yellow onions.  We've already used three or four of them!  I also bought a close cousin of the beloved onion: shallots.  They are small (thumb-sized), garlic shaped onions.


I bought a small carton of shallots for my next farmer's market cooking adventure.  After some research, I decided upon Ina Garten's (Barefoot Contessa) recipe for Carmelized Shallots.

First step, peel off the papery skin!


See how they have little "cloves" like garlic?  They're also juicy and layered like an onion.  And, boy, do they smell like onion.  My eyes were watering by the end of the stack, and my eyes hardly ever water when I chop onions!

Next step, brown!


Is that butter?  Oh yes, and sugar, too.  We're carmelizing these suckers.  Yum-o!

Cook until they look like this, shaking the pan every once in a while:


Magic, I tell you, magic.

You'll then add Red Wine Vinegar, salt and pepper, and cook until soft.  (I skipped the oven, and just put a lid on the pot--it was 100 degrees today, and my little apartment heats up fast!)


I couldn't get the colors right in this picture (the lighting in my kitchen isn't set up for photography, imagine that), but you can see that they are getting soft and the sauce is thick and coating the shallots.

In the end, you'll get something quite delicious.  Try not to salivate when you look at the photo...


I served this with the easiest chicken ever (recipe below--makes it very tender and moist) and zucchini and squash casserole.  Handsome and I ate the shallots with the chicken, and it was delicious!!!  I would definitely make this again, and look forward to trying out more recipes with this dear cousin of my favorite veggie!


Crockpot Chicken
from my friend Suzanne

Chicken Breasts
Chicken Broth

Put raw chicken breasts in crock pot.  Pour over chicken broth to cover chicken.  (I used 3 chicken breasts and 2 c. broth in my small crock pot.)  Cover and cook on low 7-8 hours.

Wednesday, July 20, 2011

Recipe: Homemade Salsa

Handsome and I looove chips and salsa.  When we were first married, we would eat at least a jar per week.  Handsome realized that it was adding up really quickly on our grocery bill, so he suggested that I make salsa from scratch.  I wasn't too keen on the idea at first, because it sounded hard and the last time I tried to make salsa it ended up disgusting (I know, you're thinking "How can salsa be gross? It's so good!", but I managed it...).  Maybe a month later, after some gentle prodding, I decided I would attempt something.  I had a basic idea of what goes into good salsa (my childhood best friend's mom is famous for her salsa, and she once showed me how to make it... a loooong, long time ago... sorry, I don't know what's up with the repeated o's... long day at work?).  It actually turned out good.  I was a little surprised.

We now make this about twice a month.  It lasts us 1 to 2 weeks.


You will need two 28 oz. cans of whole peeled tomatoes.  The store brand works juuuust fine.  You could also use fresh tomatoes, just blanch them to remove the skins and go for it!


Drain them both.  This is important, unless you like really, really watery salsa (which I do not).


You will also need 1/4 of a red onion, a clove or two of garlic, 2 oz. of chopped canned jalapenos (or a few fresh ones, seeds removed), and a big handful of cilantro (depends on your taste).  Put all of these in a blender and add one can of tomatoes.


Puree this to death.  Chop it up really good so the flavor gets distributed throughout the salsa.  It should look like the above photo, but maybe even more green if you added lots of cilantro.  Remove to a separate bowl.


Now add the other can of tomatoes and pulse in your blender until coarsely chopped.


It's hard to tell in this photo, but it's not as smooth as the first mixture, because you want a few chunks of tomatoes.  Unless you don't... then puree away.  Your prerogative.


Now you need a can of green chilies.  This will add a little spice and some colorful chunks.  I'm all about the chunks in my salsa.  I like something with body, something my chip can hold on to, something I can sink my teeth into, ya know?


Stir in your chilies, pepper, and cumin.  Taste it with a tortilla chip and adjust seasonings to taste.  You may want to add some salt, but I usually don't.  I also never add sugar or vinegar.  Those things don't belong in salsa at our house.  Yours may be different.  Just go with it.


You should now have some delicious homemade salsa to stuff your face with.  Go ahead, you're eating so many vegetables... it makes my brain spin that something soooo tasty is basically vegetable dip.  Evidence that there is a God, and that He loves us.  Just sayin'.

Here's the recipe in full form:

Homemade Salsa
by The Spares

2 (28 oz.) Cans of Whole Tomatoes, Drained
1/2 (4 oz.) Can of Diced Jalapenos or 1-2 fresh Jalapenos (seeds removed)
1/4 Medium Red Onion (or whatever onion you have)

1-2 Cloves Fresh Garlic (you may sub garlic powder, just add it with the spices at the end)
1 Big Handful of Fresh Cilantro
1 (7 oz.) Can of Diced Green Chile Peppers
1/4 t. Black Pepper
1-2 T. Ground Cumin
Salt (optional)

In a blender, add jalapenos, onion, garlic, cilantro and one can of tomatoes.  Puree until smooth. Pour in a separate bowl.
Add second can of tomatoes to blender and pulse until chopped.  Pour into the bowl with other ingredients.
Stir in chilies, pepper and cumin.  Taste with a tortilla chip and add salt if necessary.

I'm not sure how much it makes, but I'd guess 4-5 cups.